Quick and Delicious Pea Omelette Recipe: A High-Protein Breakfast Everyone Will Love
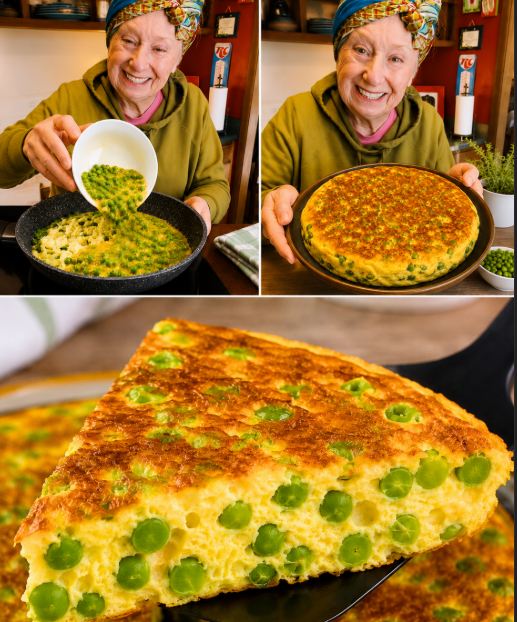
If you are looking for a simple, nutritious, and satisfying meal, this quick and delicious pea omelette recipe is exactly what you need. Loaded with sweet green peas, fluffy eggs, and melted cheese, this hearty dish is perfect for breakfast, brunch, lunch, or even a light dinner.
Unlike a traditional folded omelette, this version is cooked in a frittata style, making it thicker, cheesier, and easier to serve for the whole family. The combination of eggs, parmesan cheese, onions, and peas creates a rich and savory flavor that tastes comforting while still feeling fresh and light.
One of the best things about this pea omelette recipe is that it uses frozen peas, which means you can prepare it all year round without worrying about seasonal ingredients. It is also beginner-friendly and requires only a few pantry staples.
In this detailed guide, you will learn everything about making the perfect pea omelette, including ingredients, cooking instructions, variations, storage tips, nutritional benefits, and expert cooking advice.
Why You Will Love This Pea Omelette
There are countless reasons why this recipe deserves a place in your weekly meal rotation.
Easy to Prepare
This recipe requires minimal prep work and simple ingredients. Even beginner cooks can make it successfully on the first try.
High in Protein
Eggs and cheese provide a generous amount of protein, making this dish filling and energizing.
Budget-Friendly
Frozen peas, eggs, and onions are affordable ingredients that are easy to find in any grocery store.
Perfect for Any Meal
Although commonly served for breakfast, this omelette is also excellent for lunch, brunch, or dinner.
Great for Meal Prep
You can make the omelette ahead of time and store leftovers for quick meals during busy weekdays.

What Is a Pea Omelette?
A pea omelette is a savory egg-based dish made with green peas, onions, cheese, and eggs. While traditional omelettes are folded around fillings, this version is cooked flat like a frittata.
The peas add sweetness and texture, while the cheese makes the omelette creamy and flavorful. Because the omelette is thicker than classic versions, it can easily be sliced into wedges and served family-style.
This dish is especially popular among people looking for healthy high-protein meals that are quick and convenient.
Ingredients for the Best Pea Omelette
Here are the ingredients you need to make this delicious recipe.
Main Ingredients
Extra Virgin Olive Oil
Olive oil helps cook the onions and adds a subtle richness to the dish.
Onion
The onion adds sweetness and depth of flavor. Cooking it until soft removes the harsh raw taste.
Frozen Peas
Frozen peas are convenient, affordable, and naturally sweet. They also cook quickly.
Water
Water helps soften the peas while cooking.
Salt
Salt enhances all the flavors in the omelette.
Eggs
Eggs are the base of the recipe and create the fluffy texture.
Parmesan Cheese
Parmesan adds a salty and nutty flavor that pairs beautifully with peas.
Shredded Cheese
Mozzarella, cheddar, Swiss, or provolone all work well in this recipe.
Full Ingredient List
- 2 tablespoons extra virgin olive oil
- 1 onion, finely chopped
- 300g frozen peas
- 200ml water
- Salt to taste
- 4 eggs
- 30g grated parmesan cheese
- 40g shredded cheese of your choice
How to Make Pea Omelette Step by Step
This recipe comes together in just a few easy steps.
Step 1: Cook the Onion
Heat olive oil in a non-stick frying pan over medium heat.
Add the chopped onion and cook for several minutes until soft and translucent. Stir occasionally to prevent burning.
Cooking the onion slowly helps release its natural sweetness and improves the overall flavor of the omelette.
Step 2: Add the Peas
Add the frozen peas, water, and a pinch of salt to the pan.
Cook the mixture until the peas become tender and the water completely evaporates.
Once cooked, transfer the pea mixture to a large bowl and let it cool slightly.
Step 3: Prepare the Egg Mixture
In another bowl, whisk the eggs together with the grated parmesan cheese.
Pour the egg mixture into the bowl with the peas and onions. Stir until everything is evenly combined.
Step 4: Build the Omelette
Lightly grease the frying pan again if necessary.
Pour half of the pea and egg mixture into the pan.
Sprinkle the shredded cheese evenly over the top.
Add the remaining pea mixture over the cheese layer.
Step 5: Cook the Omelette
Cover the pan with a lid and cook over low to medium heat for about 10 minutes.
The lid is important because it traps heat and helps the omelette cook evenly.
Once the bottom is golden and the top begins to set, carefully flip the omelette.
Cook the other side for several more minutes until fully cooked through.
Step 6: Serve
Transfer the omelette to a plate.
Slice into wedges and serve immediately while warm and cheesy.
Tips for Making the Perfect Pea Omelette
Use a Non-Stick Pan
A good non-stick skillet makes flipping the omelette much easier.
Cook on Medium-Low Heat
Cooking too quickly may burn the outside before the inside is fully cooked.
Do Not Skip the Lid
Covering the pan ensures even cooking and prevents a runny center.
Season Properly
Taste the pea mixture before adding eggs to ensure the seasoning is balanced.
Let the Omelette Rest
Allowing the omelette to rest for 2 minutes before slicing helps it hold its shape better.
Best Cheese Options for Pea Omelette
The cheese you choose can completely change the flavor of the dish.
Mozzarella
Creates a stretchy and creamy texture.
Cheddar
Adds a bold and rich flavor.
Swiss Cheese
Provides a nutty and slightly sweet taste.
Provolone
Melts beautifully and gives a smooth texture.
Parmesan
Essential for adding depth and savory flavor.
You can also combine several cheeses for a more complex taste.
Can You Add Extra Protein?
Absolutely.
This pea omelette is already protein-rich, but you can make it even heartier by adding:
- Crispy bacon
- Pancetta
- Ham
- Smoked salmon
- Chicken sausage
- Turkey bacon
These ingredients add smoky and savory flavors that pair perfectly with peas and cheese.
Vegetable Variations
Peas combine well with many vegetables.
Try adding:
- Spinach
- Asparagus
- Mushrooms
- Bell peppers
- Zucchini
- Broccoli
- Kale
Adding more vegetables increases the nutritional value while making the omelette even more colorful and flavorful.
Fresh Herbs That Work Well
Fresh herbs bring brightness and freshness to the recipe.
The best options include:
- Basil
- Chives
- Parsley
- Dill
- Mint
Sprinkle herbs on top before serving for the best flavor.
Is Pea Omelette Healthy?
Yes, this recipe can be part of a healthy balanced diet.
High in Protein
Eggs and cheese help keep you full for longer.
Rich in Vitamins
Peas contain vitamins A, C, and K along with fiber and antioxidants.
Good Source of Calcium
Cheese and parmesan provide calcium for strong bones.
Naturally Vegetarian
This recipe is perfect for vegetarians when prepared without meat additions.
Nutritional Benefits of Peas
Peas are often underrated, but they are packed with nutrients.
High in Fiber
Fiber supports digestion and promotes fullness.
Plant-Based Protein
Peas contain plant protein that complements the eggs.
Rich in Antioxidants
Peas contain antioxidants that help protect the body from inflammation.
Supports Heart Health
Peas contain nutrients that may support healthy blood pressure and cholesterol levels.
What to Serve with Pea Omelette
This omelette pairs well with many side dishes.
Breakfast Ideas
- Toasted sourdough bread
- Avocado slices
- Fresh fruit
- Yogurt
Lunch and Dinner Ideas
- Green salad
- Roasted vegetables
- Tomato salad
- Soup
- Garlic bread
Can You Make It Ahead of Time?
Yes.
This pea omelette stores very well and reheats beautifully.
It is perfect for meal prep and busy mornings.
How to Store Leftover Omelette
Allow the omelette to cool completely before storing.
Place slices in an airtight container and refrigerate for up to 3 days.
How to Reheat Pea Omelette
Microwave Method
Heat slices in the microwave for 30 to 60 seconds.
Stovetop Method
Warm slices in a non-stick pan over low heat until heated through.
Oven Method
Place slices in a preheated oven at 180°C for about 10 minutes.
Can You Freeze Pea Omelette?
Yes, although the texture may slightly change after thawing.
Wrap individual slices tightly in plastic wrap and store them in a freezer-safe container.
Freeze for up to 2 months.
Thaw overnight in the refrigerator before reheating.
Common Mistakes to Avoid
Overcooking the Eggs
Overcooked eggs can become dry and rubbery.
Using High Heat
High heat may burn the outside before the inside cooks properly.
Skipping the Lid
Without a lid, the center may remain undercooked.
Not Draining Excess Water
Make sure all water evaporates from the peas before adding eggs.
Frequently Asked Questions
Can I Use Fresh Peas Instead of Frozen?
Yes. Fresh peas work wonderfully when in season.
Simply cook them slightly longer if needed.
Can I Make This Recipe Dairy-Free?
Yes. Use dairy-free cheese alternatives or skip the cheese completely.
What Pan Size Should I Use?
An 8 to 10-inch non-stick skillet works best.
How Do I Flip the Omelette Easily?
Place a large plate over the pan, flip carefully, then slide the omelette back into the pan.
Why This Recipe Is Perfect for Busy Families
This recipe is ideal for families because it is:
- Quick to prepare
- Affordable
- Nutritious
- Kid-friendly
- Easy to customize
You can also double the recipe for larger gatherings or meal prep.
Final Thoughts
This quick and delicious pea omelette recipe is proof that simple ingredients can create incredibly satisfying meals. The combination of fluffy eggs, sweet peas, savory onions, and melted cheese results in a comforting dish that works for breakfast, lunch, or dinner.
Whether you are cooking for yourself or feeding your family, this easy pea omelette is guaranteed to become one of your favorite go-to recipes. It is nutritious, budget-friendly, customizable, and packed with flavor.
The next time you need a quick high-protein meal, give this cheesy pea omelette a try. Once you taste the crispy golden exterior and soft cheesy center, you will want to make it again and again.