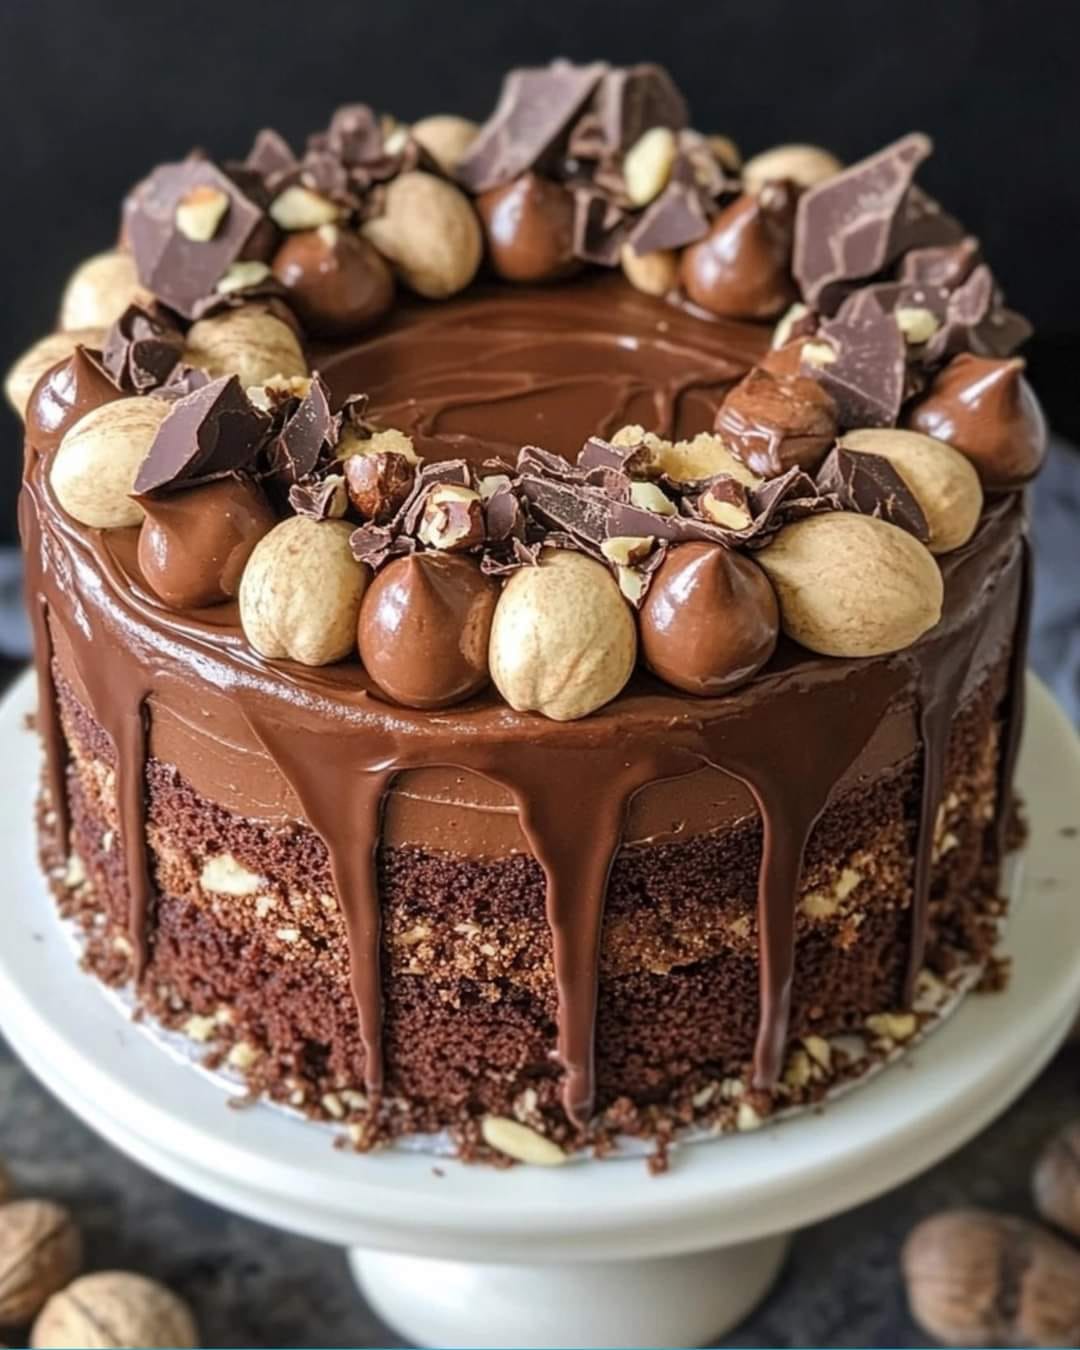
Ultimate Chocolate Hazelnut Cake – A Show-Stopping Dessert for Special Occasions
Introduction
Looking for a dessert that will leave everyone in awe? This Ultimate Chocolate Hazelnut Cake is the perfect choice! With its rich chocolate layers, creamy hazelnut frosting, and a glossy chocolate drip, this cake is as delicious as it is stunning. Whether it’s a birthday, anniversary, or a celebration of your love for chocolate, this recipe will help you create a masterpiece that’s bound to impress.
Ingredients
For the Cake:
- 2 ¾ cups (345g) all-purpose flour
- 1 cup (85g) cocoa powder
- 1 tsp baking powder
- 1 tsp baking soda
- ½ tsp salt
- 1 cup (225g) unsalted butter, softened
- 2 cups (400g) granulated sugar
- 4 large eggs, room temperature
- 1 ½ tsp vanilla extract
- 1 cup (240ml) sour cream
- ½ cup (120ml) strong brewed coffee (or hot water)
For the Hazelnut Frosting:
- 1 cup (225g) unsalted butter, softened
- 1 cup (280g) hazelnut spread
- 4 ½ cups (560g) powdered sugar
- 2–3 tbsp heavy cream
- ½ tsp almond extract (optional)
For the Chocolate Ganache Drip:
- ½ cup (120ml) heavy cream
- 1 cup (170g) dark chocolate, chopped
- 1 tbsp butter (for extra shine)
For Decoration:
- Whole hazelnuts
- Chocolate candies or pralines
- Chocolate curls or shards
- Crushed hazelnuts or almonds

Instructions
Step 1: Bake the Chocolate Cake
- Preheat your oven to 350°F (175°C) and grease three 8-inch (20cm) cake pans. Line the bottoms with parchment paper for easy release.
- In a bowl, whisk together the flour, cocoa powder, baking powder, baking soda, and salt.
- In a large mixing bowl, cream the butter and sugar until light and fluffy. Add eggs one at a time, beating well after each addition. Stir in the vanilla extract.
- Add the dry ingredients and sour cream alternately to the wet ingredients, mixing just until combined. Stir in the brewed coffee for a rich flavor and smooth batter.
- Divide the batter evenly between the prepared pans and bake for 25–30 minutes, or until a toothpick inserted in the center comes out clean.
- Let the cakes cool completely before assembling.
Step 2: Prepare the Hazelnut Frosting
- Beat the softened butter and hazelnut spread together until creamy and smooth.
- Gradually add powdered sugar, one cup at a time, mixing well. Add heavy cream and almond extract (if using) for a spreadable and fluffy consistency.
Step 3: Make the Chocolate Ganache Drip
- Heat the heavy cream in a small saucepan until it just begins to simmer. Remove from heat and pour it over the chopped dark chocolate.
- Let it sit for 2–3 minutes, then stir until smooth. Add the butter for extra shine. Allow the ganache to cool slightly before using.
Step 4: Assemble the Cake
- Level the cake layers if needed. Spread an even layer of hazelnut frosting between each cake layer.
- Apply a crumb coat to the entire cake to seal in any crumbs, then chill for 20 minutes. Add a smooth final coat of frosting.
- Drizzle the cooled chocolate ganache around the top edge of the cake, letting it drip naturally down the sides. Spread any remaining ganache over the top for a glossy finish.
Step 5: Decorate
- Arrange whole hazelnuts, chocolate candies, and pralines around the top of the cake.
- Add chocolate curls or shards for an elegant touch. Sprinkle crushed hazelnuts around the base of the cake for added texture.
Pro Tips for Success
- Use room-temperature ingredients to ensure a smooth batter and frosting.
- Chill the cake layers before assembling to make frosting easier and neater.
- If the ganache becomes too thick, reheat gently or add a teaspoon of warm cream to adjust consistency.
Conclusion
This Ultimate Chocolate Hazelnut Cake is a chocolate lover’s dream come true. Its luxurious layers and beautiful decorations make it perfect for any special occasion. Share your creation with friends and family, and don’t forget to take a picture – this cake is as photogenic as it is delicious!
Enjoy every slice, and happy baking!