Homemade Mars Bar Candy Bars Recipe: The Ultimate Guide to Making This Classic Chocolate Treat at Home
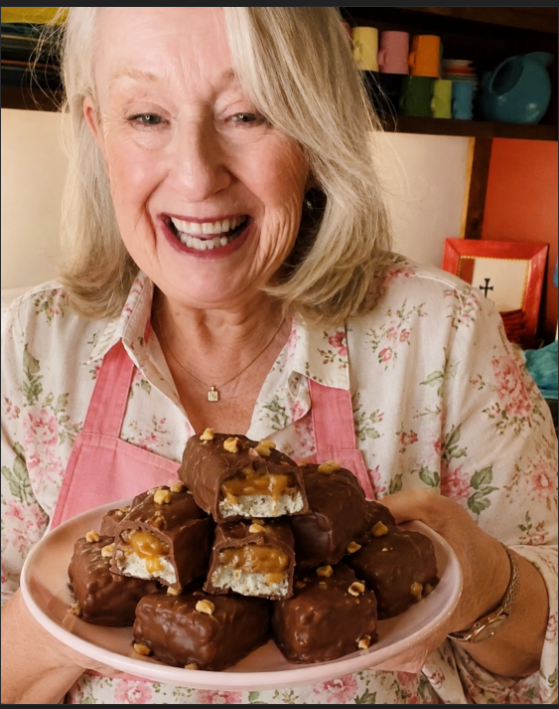
There’s something timeless about the rich combination of soft nougat, creamy caramel, and smooth milk chocolate wrapped together in a delicious candy bar. Homemade Mars Bar Candy Bars bring all the nostalgic flavor of the classic store-bought favorite into your own kitchen, with even better freshness and texture.
These chocolate bars are indulgent, chewy, creamy, and incredibly satisfying. Best of all, they are surprisingly simple to make. You do not need advanced candy-making skills or special equipment to create a batch of homemade candy bars that taste bakery-quality and look absolutely irresistible.
Whether you are preparing treats for a family gathering, holiday dessert table, homemade gifts, or simply satisfying your sweet tooth, this recipe delivers impressive results every single time.
In this complete guide, you will learn everything you need to know about making Homemade Mars Bar Candy Bars, including ingredients, step-by-step instructions, expert tips, storage advice, flavor variations, and common mistakes to avoid.
Why You Will Love These Homemade Mars Bar Candy Bars
Homemade candy bars have become increasingly popular because they allow you to recreate iconic flavors while controlling the quality of ingredients and freshness. These bars are especially loved because they combine multiple textures and layers into one unforgettable dessert.
Here are some reasons why this recipe stands out:
Rich Chocolate Flavor
The outer milk chocolate coating creates a smooth and decadent shell that perfectly complements the chewy caramel and fluffy nougat inside.
Soft and Creamy Nougat
Unlike many homemade candy recipes that become too dense or sticky, this nougat layer stays soft, fluffy, and melt-in-your-mouth delicious.
Easy to Make
This recipe does not require complicated candy-making techniques. Even beginner bakers can achieve excellent results.

Perfect for Special Occasions
These bars are ideal for:
- Holiday dessert trays
- Birthday parties
- Homemade food gifts
- Bake sales
- Family movie nights
- Weekend treats
Freezer-Friendly
You can make a large batch ahead of time and freeze them for future cravings.
What Are Homemade Mars Bar Candy Bars?
Homemade Mars Bar Candy Bars are inspired by the classic Mars candy bar known for its layered texture and rich chocolate flavor.
This homemade version includes:
- A fluffy nougat base
- A creamy caramel center
- A thick milk chocolate coating
The result is a chewy, creamy, chocolate-covered dessert bar that tastes incredibly close to the original candy bar while offering a fresher homemade texture.
Preparation Time
Understanding the preparation timeline helps ensure the recipe goes smoothly.
- Prep Time: 25 minutes
- Chill Time: 2 to 3 hours
- Total Time: Approximately 3 hours
Servings
This recipe makes approximately 12 to 16 bars depending on how large you cut them.
Estimated Calories
Each bar contains approximately 280 to 350 calories depending on size and chocolate coating thickness.
Ingredients for Homemade Mars Bar Candy Bars
Using quality ingredients makes a major difference in both flavor and texture.
For the Nougat Layer
- 1/4 cup unsalted butter
- 1 cup granulated sugar
- 1/4 cup evaporated milk
- 1 1/2 cups marshmallow fluff
- 1/4 cup creamy peanut butter
- 1 teaspoon vanilla extract
For the Caramel Layer
- 1 cup soft caramels, unwrapped
- 2 tablespoons heavy cream
For the Chocolate Coating
- 2 cups milk chocolate chips
- 1 tablespoon coconut oil (optional)
Essential Kitchen Tools
Before starting, gather the following kitchen equipment:
- 8×8-inch baking dish
- Parchment paper
- Medium saucepan
- Mixing spoon or silicone spatula
- Microwave-safe bowl
- Sharp knife
- Baking tray or plate
- Refrigerator and freezer
Step-by-Step Instructions
Step 1: Prepare the Baking Dish
Line an 8×8-inch baking dish with parchment paper. Leave extra parchment hanging over the sides to make lifting the bars easier later.
This step is important because it prevents sticking and simplifies cleanup.
Step 2: Make the Nougat Layer
Place a saucepan over medium heat and melt the butter completely.
Add the sugar and evaporated milk while stirring continuously. Continue cooking for about 4 to 5 minutes until the sugar dissolves and the mixture slightly thickens.
Remove the saucepan from the heat.
Stir in:
- Marshmallow fluff
- Peanut butter
- Vanilla extract
Mix everything thoroughly until the mixture becomes smooth and creamy.
Pour the nougat mixture into the prepared baking dish and spread evenly using a spatula.
Place the dish in the refrigerator for 30 to 45 minutes until the layer becomes firm.
Why the Nougat Layer Matters
The nougat layer forms the foundation of the candy bar. It provides softness, sweetness, and that signature chewy texture associated with classic candy bars.
The marshmallow fluff creates lightness while the peanut butter adds richness and subtle depth of flavor.
Step 3: Make the Caramel Layer
Place the soft caramels and heavy cream into a microwave-safe bowl.
Heat in 30-second intervals, stirring between each interval until the caramel becomes completely melted and smooth.
Pour the caramel over the chilled nougat layer.
Spread evenly with a spatula.
Return the dish to the refrigerator and chill for another 30 minutes.
Tips for Perfect Caramel
Getting smooth caramel is easy when you follow these simple tips:
- Use soft fresh caramels
- Stir frequently while melting
- Avoid overheating
- Add cream gradually if needed
The caramel should be pourable but still thick enough to create a defined layer.
Step 4: Cut Into Bars
Once both layers are fully chilled, lift the dessert from the pan using the parchment paper overhang.
Place on a cutting board and cut into bars or squares.
Arrange the bars on a parchment-lined tray.
Freeze for 20 to 30 minutes before dipping them into chocolate.
Why Freezing Before Dipping Is Important
Freezing helps the bars maintain their shape during chocolate coating.
Without chilling, the caramel may become too soft and difficult to handle.
Cold bars also help the chocolate set more quickly and evenly.
Step 5: Coat the Bars in Chocolate
Place the chocolate chips and optional coconut oil into a microwave-safe bowl.
Melt in short intervals, stirring until smooth and glossy.
Using forks or dipping tools, dip each chilled bar into the melted chocolate until fully coated.
Allow excess chocolate to drip off before placing the bars onto parchment paper.
Refrigerate until the chocolate hardens completely.
How to Get Smooth Chocolate Coating
The chocolate shell is one of the most important parts of this recipe.
Here are a few expert tricks:
Add Coconut Oil
Coconut oil creates a smoother, shinier finish and makes dipping easier.
Use High-Quality Chocolate
Premium chocolate chips melt better and taste richer.
Stir Frequently
This prevents burning and keeps the chocolate silky smooth.
Let Bars Set Properly
Allow the chocolate to fully harden before stacking or storing.
Texture Breakdown
One reason these homemade candy bars are so addictive is the contrast of textures.
Chocolate Shell
Smooth, rich, and slightly crisp when bitten.
Caramel Layer
Soft, stretchy, and chewy without being overly sticky.
Nougat Base
Light, fluffy, creamy, and sweet.
Together, these layers create the perfect candy bar experience.
Expert Tips for the Best Homemade Mars Bar Candy Bars
Chill Between Every Layer
This helps maintain clean layers and prevents ingredients from blending together.
Use Parchment Paper
Parchment paper makes removing and slicing the bars much easier.
Cut With a Sharp Knife
For clean slices, wipe the knife between cuts.
Freeze Before Dipping
Cold bars are easier to coat neatly in chocolate.
Avoid Moisture in Chocolate
Even a small amount of water can cause chocolate to seize.
Flavor Variations
One of the best things about homemade recipes is customization.
Here are some delicious ways to change the flavor profile.
Dark Chocolate Mars Bars
Replace milk chocolate with dark chocolate for a richer, less sweet version.
Dark chocolate also balances the sweetness of the caramel beautifully.
Salted Caramel Version
Sprinkle flaky sea salt on top before the chocolate sets.
The salty-sweet contrast creates gourmet bakery-style candy bars.
Peanut Lovers Version
Add chopped roasted peanuts between the nougat and caramel layers.
This adds crunch and extra nutty flavor.
Extra Chewy Caramel
Mix one tablespoon of corn syrup into the caramel for a softer, stretchier texture.
Mini Bite-Sized Candy Bars
Cut the bars into smaller squares for party desserts or snack platters.
Mini portions are also great for holiday gift boxes.
White Chocolate Coating
Swap milk chocolate for white chocolate for a completely different flavor experience.
Common Mistakes to Avoid
Even simple dessert recipes can go wrong if certain steps are skipped.
Here are the most common mistakes and how to avoid them.
Skipping Chill Time
Patience is essential.
Warm layers will slide apart and create messy bars.
Overheating Chocolate
Burned chocolate becomes grainy and unusable.
Always melt slowly and stir frequently.
Using Thin Caramel
Runny caramel may leak out during dipping.
Use thick caramel that cools properly.
Not Lining the Pan
Without parchment paper, removing the bars becomes difficult.
Cutting Before Fully Chilled
Warm bars will not slice cleanly and may collapse.
How to Store Homemade Mars Bar Candy Bars
Proper storage keeps the bars fresh and delicious.
Refrigerator Storage
Store bars in an airtight container in the refrigerator for up to 1 week.
Separate layers with parchment paper to prevent sticking.
Freezer Storage
These candy bars freeze extremely well.
To freeze:
- Wrap bars individually
- Place in freezer-safe container
- Freeze for up to 2 months
Thaw in the refrigerator before serving.
Can You Make These Ahead of Time?
Absolutely.
These bars are perfect for preparing in advance because the flavor and texture hold up beautifully after refrigeration.
Many people actually prefer them chilled because the chocolate shell becomes firmer and more satisfying.
Best Occasions for Homemade Candy Bars
These bars fit almost any celebration or dessert table.
Holidays
Perfect for Christmas dessert trays and edible gift boxes.
Birthday Parties
Kids and adults both love homemade candy bars.
Bake Sales
They look professional and sell quickly.
Movie Nights
Serve chilled bars as an indulgent sweet snack.
Homemade Gifts
Wrap individually for beautiful edible presents.
Frequently Asked Questions
Can I Use Store-Bought Caramel Sauce?
It is better to use soft caramels because caramel sauce may be too runny.
Can I Make These Without Peanut Butter?
Yes. You can omit the peanut butter or replace it with almond butter or sunflower butter.
Do I Need a Candy Thermometer?
No. This recipe is beginner-friendly and does not require one.
Can I Use Semi-Sweet Chocolate?
Yes. Semi-sweet chocolate works well if you prefer less sweetness.
Why Did My Chocolate Crack?
Rapid temperature changes can cause cracking. Allow bars to cool gradually after coating.
Nutritional Information
Approximate values per bar:
- Calories: 280–350
- Carbohydrates: 35g
- Fat: 15g
- Protein: 3g
- Sugar: 28g
Values vary depending on portion size and chocolate thickness.
The Secret to Perfect Homemade Candy Bars
The true secret lies in patience and layering.
Allowing each layer to chill properly ensures beautiful, professional-looking bars with distinct textures.
Using quality chocolate and fresh caramel also dramatically improves the final result.
Homemade versions often taste even better than commercial candy bars because they contain fresher ingredients and richer flavors.
Final Thoughts
Homemade Mars Bar Candy Bars are the ultimate chocolate lover’s dessert. With layers of fluffy nougat, chewy caramel, and smooth milk chocolate, every bite delivers a nostalgic candy-bar experience that feels both comforting and indulgent.
This recipe is easy enough for beginners while still producing impressive results that look and taste bakery-quality. Whether you are making them for holidays, parties, gifts, or simply as a homemade sweet treat, these bars are guaranteed to become a favorite.
Once you try making homemade candy bars from scratch, you may never want store-bought versions again.